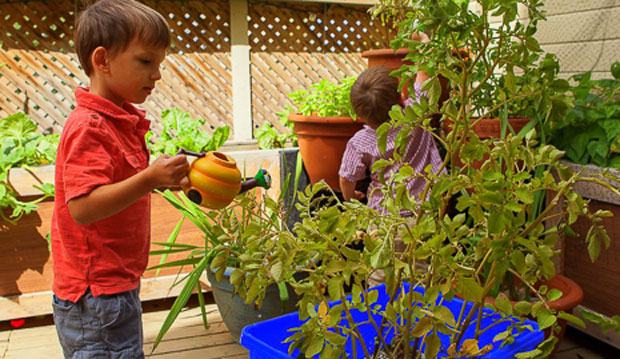
Use a large, deep pot or even a recycling bin, and you and your kids can start a potato patch on your patio, balcony or deck. Let 4-year-old Quinn show you how to do it.
- While there are a number of different types of potatoes available, some of the smaller types such as banana or fingerling are better for container growing. For the best selection of seed potatoes, visit garden centers early in the season. Seed potatoes are usually available in late March through April and sometimes in May, depending on the weather. After purchasing them, store the seed potatoes in a relatively cool dark place until you’re ready to plant. Check on the tubers regularly and remove any signs of rot or decay.
- Potato plants grow from eyes (little buds) that appear on the surface of the potato. Be sure each piece of the potato has at least one eye (Ask mom or dad to cut up and divide large potatoes with a sharp knife).
- Select a large, deep planter with lots of drainage holes. Recycling bins work well.
- Scoop 7 to 10 centimetres of potting mix into the bottom of the container. For an extra boost, add some compost or well-rotted manure (up to about a third of the volume of the potting mix).
- Place seed potatoes into the container, spacing them evenly and gently pushing them into the container mix.
- Cover the tubers with about 2 to 6 centimetres of potting mix.
- Water well and place the bin or container in a very sunny spot (six to eight hours or more of direct sunlight, although at the Toronto Botanical Garden we have had relatively good success with bins growing in as little as four hours of sun daily.
- Once plants begin to grow and have reached about 15 to 20 centimetres high, add more potting mix, enough to cover all but 8 to 20 10 centimetres of potato plant. (This is called “hilling up”.) Continue topping up with soil throughout the growing season as the plants grow taller.
- Check and water containers regularly, but try not to over-water; potato plants don’t need constant moisture. Throughout the growing season, feed the plants with an organic, water-soluble fertilizer at the rate recommended on the label.
- When your potato plants begin to flower, stop fertilizing. (No need to remove the flowers; pollinating insects such as honey bees love them!) Now the plants will begin to die back, turning yellow and brown. Do not be alarmed! This is perfectly normal. Reduce the amount and frequency of watering.
- Once the leaves and stems have died back and turned brown, stop watering completely and allow the potting mix to dry out.
- Now the hunt begins! Carefully remove the plants and the soil from the container and dig for the new potatoes. Handle them carefully; the skin on the tubers is very thin and easily damaged.
- If you plan to eat them right away, wash and prepare the potatoes and cook them for dinner. If you’re storing them, carefully brush the soil off the tubers and allow them to air dry for about a week. (This causes the potato skins to thicken.) Gently brush off any remaining soil every few days. When air drying the new potatoes, be sure to not expose them to direct sunlight — if you don’t have a shady spot, cover them with a few sheets of newspaper.
- Enjoy your harvest!
TIP: For a continuous supply of fresh potatoes through the season, plant a new bin every two weeks from early April to the end of May
Photos: Justin Van Leeuwen/JVLPHOTO.COM


Comments are closed.